Introduction
You have spent hours perfecting your logo, getting the colors just right, and making sure every detail is exactly where it should be. Now you want to embroider that logo onto uniforms, bags, or gifts for your business. You save the image to a USB drive, plug it into your Janome machine, and hit start. Nothing happens. Or worse, the machine spits out an error message that makes no sense. This is the moment when many people realize that embroidery machines cannot read regular image files. The process to convert logo to JAN embroidery format is the critical step that transforms your artwork into a file your machine actually understands.
What Exactly Is a JAN File?
Before you start the conversion process, you need to understand what a JAN file actually is. A JAN file is the master data file created in Janome Digitizer MBX V4.5 and all its previous versions . It is not just another embroidery format. This file contains detailed object information that makes your design editable and production-ready.
The JAN file stores essential data including object properties, thread color assignments, fill patterns, stitch density, and dimensions . Think of it as the blueprint for your embroidery design. Each element in your design has its own "slot" in the JAN file, holding all the properties that describe that piece of embroidery .
This is why professional digitizers love working with JAN files. They allow you to save an incomplete embroidery design and come back to it later for easy modifications . You are not stuck with a final, unchangeable stitch file. You have the flexibility to tweak and perfect your design before it ever touches fabric.
Understanding the Janome File Family
To successfully convert your logo, you need to know how JAN fits into the broader Janome file ecosystem.
JEF files are the stitch data files that Janome machines actually read during production. JEF is the default format for all current Janome and Elna embroidery machines . These files contain machine-readable instructions that coordinate the hoop movement and every single stitch in your design . When you are ready to sew, you will typically export your design as a JEF file for your machine to use.
JAN files are your master data files created in the digitizing software . They hold all the editable object data, color assignments, and density settings. The JAN file is the stage where you can make changes before sending it to become stitches and saving as a JEF file .
JEF+ is another format that contains editable stitch data created in the machine or Horizon Link software. It allows you to move, rotate, and resize individual designs even after they have been grouped together .
There is also JPX, which contains exclusive information for newer Janome machines, including special functions and background images for display on the machine screen .
Why You Cannot Just Use an Image File
This is the part that confuses so many people. Your computer monitor displays images using pixels, tiny colored dots that form a picture. Your Janome embroidery machine does not see pixels. It sees coordinates and instructions .
Standard image formats like JPG, PNG, GIF, and BMP are perfect for viewing and printing. But embroidery machines cannot read them directly because they lack essential stitch information .
An embroidery file like JAN contains instructions that guide the needle: where to place each stitch, what type of stitch to use, which direction the stitches should go, how dense they should be, when to change thread, and the sewing sequence for the entire design . Without this information, your machine simply cannot create the design correctly.
How to Convert Logo to JAN Format
Converting your logo is a process that requires specialized software. You cannot just rename a JPEG file to a JAN file and expect it to work. Here is the step-by-step process.
Step 1: Prepare Your Logo Artwork
The process begins with preparing your logo in the right format. Always start with a clean, high-resolution image, preferably in a vector-based format like AI, EPS, or SVG . These file types maintain quality when resized and make it easier to define clear stitch paths.
Remove any unnecessary backgrounds, shadows, or very fine details that might not translate well into stitches . Simplify the design to solid colors. Embroidery cannot handle gradients, drop shadows, or extremely small text. If your logo has very small text, consider whether it will be readable at the size you want to stitch.
For the best auto-digitizing results, use images with solid color blocks like those found in clipart libraries or simple logos . Scanned images and photographs often contain noise and dithered colors that confuse the digitizing process .
Step 2: Import Into Digitizing Software
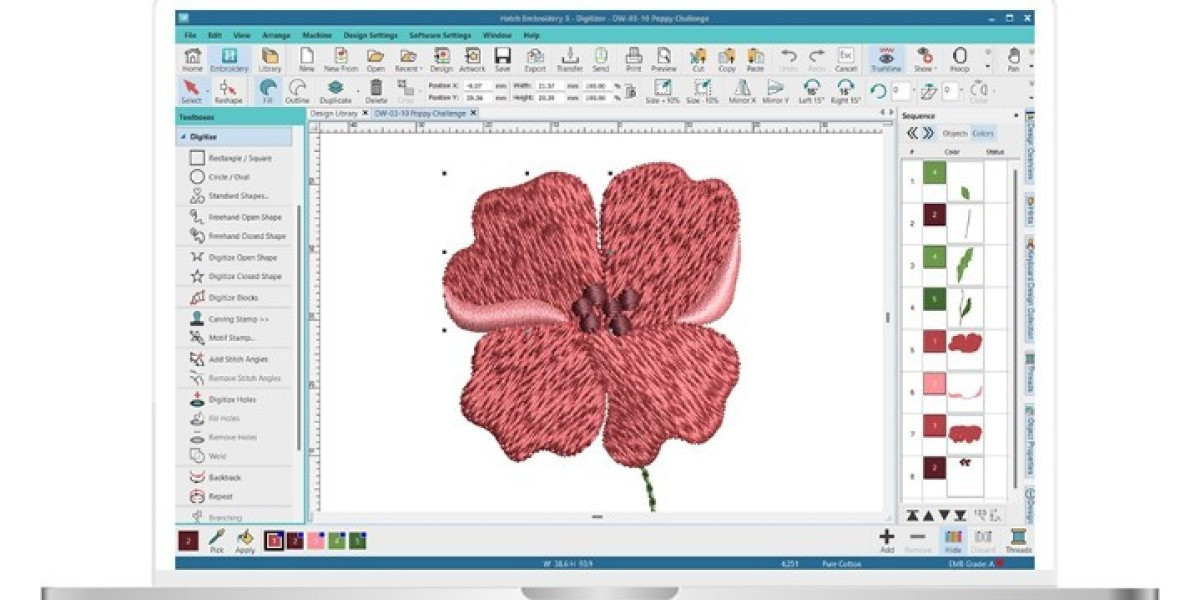
Next, import your prepared logo into professional embroidery digitizing software. The primary software for creating JAN files is Janome Digitizer MBX, with V4.5 creating JAN files as its native master format .
Other professional software also supports the JAN format. Hatch Embroidery can read JAN files , and Janome Digitizer Pro offers both automatic and manual digitizing options .
When you import your image, the software converts the artwork into stitch data by mapping out how the embroidery machine will move the needle . The digitizer adjusts stitch types, densities, and underlays according to the logo's design and fabric type.
Step 3: Assign Stitch Types Manually
Every area of the logo needs a suitable stitch type. Large, filled shapes use fill stitches, while borders or smaller text may use satin stitches for a smooth finish . Very thin lines or outlines often require run stitches for precision.
A skilled digitizer decides which stitch type will best match each element to make the logo look natural and balanced when embroidered. This manual assignment is what separates professional-quality digitizing from auto-generated files.
Step 4: Adjust Colors and Sequencing
After assigning stitches, the digitizer sets the thread colors and defines the stitching sequence . This sequence ensures that the embroidery machine sews each section in the correct order, layer by layer, without unnecessary thread trims or jumps .
Proper sequencing helps maintain clean edges, minimize thread breaks, and speed up production. In a professional workflow, you can group same colors together to reduce thread changes and machine stops.
Step 5: Save as JAN File
Once everything is finalized, save your work as a JAN file. This preserves all your object data and settings . You can now close the software and come back to make changes later because the JAN file holds all the information you need.
Step 6: Export for Your Machine
When you are ready to stitch, export the design from your software as a JEF file. JEF is the default stitch data format for Janome machines and is what your machine actually reads . The JAN file remains your editable master copy for future modifications.
Choosing the Right Digitizing Software
Janome Digitizer MBX is the primary software for creating JAN files. It is a professional embroidery program developed in collaboration with Wilcom International . The software allows you to create your own original embroidery designs, from simple stitch editing to complex multi-hoop designs.
Digitizer MBX includes features like auto-digitizing of bitmap images and vector drawings, 100 font styles, 700 clip art drawings, and 3D stitch simulation . You can work directly connected to your embroidery machine with the on-screen project option.
For those on a budget, Janome Digitizer Jr offers a more accessible entry point. While it has fewer features than the Pro version, it can still turn simple artwork into usable stitch files . However, the quality of results depends heavily on proper artwork preparation and manual adjustments.
Tips for a Successful Conversion
Converting an image is not a one-click process. The quality of your final embroidery depends heavily on the decisions you make during digitizing.
Plan your stitch types carefully. Different elements need different treatments. Satin stitches work well for text and borders, while fill stitches cover larger areas.
Adjust your density settings to match your fabric. Too dense and the fabric puckers. Too loose and the design looks patchy. Professional software allows you to fine-tune this.
Check your hoop selection. Ensure your design fits within the hoop size your machine supports. Choose the smallest hoop that comfortably fits the design to avoid the trampoline effect where too much empty fabric causes bouncing and poor registration .
Always test stitch before production. Run a test on scrap fabric similar to your final material. Check for gaps, puckering, thread breaks, or any misalignment. If you find issues, go back to your software, make adjustments, and test again.
Conclusion
Converting your logo to a JAN file is the essential first step to achieving professional embroidery on your Janome machine. JAN files are not just another format. They are your editable master files, holding all the object data, color assignments, and density settings that let you fine-tune your design before it becomes a permanent stitch file.
When you understand the difference between images and embroidery files, and when you use the right software to perform the conversion, you stop fighting your machine and start creating designs that stitch cleanly and look incredible. Take the time to learn your digitizing software. Test your settings. Save your work as JAN files so you can always go back and make improvements. Your future embroidery projects will thank you.