Introduction
You have a stunning vector design, crisp lines, perfect colors, and a client waiting for embroidered products. But when you try to load that AI or SVG file into your embroidery machine, nothing happens. Your machine just stares back at you with a blank screen. I have been there, and it is incredibly frustrating. The truth is, vector artwork and embroidery files speak completely different languages. A vector file uses mathematical equations to draw shapes and lines, allowing infinite scaling without losing quality. An embroidery file contains machine code with exact X and Y coordinates, telling the needle exactly where to drop, jump, and trim.
AI Vector to Embroidery File Conversion is the process that bridges this gap, but here is the thing. This is not just about clicking a button. It is about engineering a stitch pattern that will hold up on fabric, run efficiently, and look professional. And now, artificial intelligence is changing the game, making this conversion faster and more accessible than ever.
What Makes Vector Files Special for Embroidery
Let us start with why vectors are the gold standard for embroidery digitizing. Unlike raster images like JPGs or PNGs that are made of pixels, vector files are created using mathematical expressions to draw shapes, lines, and curves . Because they are not made of pixels, they can be scaled to any size without losing quality. This clean structure is perfect for embroidery, as the software can easily trace the paths and apply stitches.
Common vector formats include AI from Adobe Illustrator, EPS, and SVG. Designers love these formats because they are fully editable. You can change colors, resize elements, or modify shapes quickly and cleanly . This makes them ideal for high-resolution printing, web use, or creating different versions of the same design.
But here is the catch. Embroidery machines cannot read vector files directly. Unlike printers or screens that understand vector graphics, embroidery machines require files that tell them exactly where, how, and when to place stitches . This is where the digitizing process comes in.
How AI Is Transforming Vector to Embroidery Conversion
Artificial intelligence is revolutionizing how we convert vector artwork into embroidery files. Traditionally, digitizing required manual tracing, assigning stitch types, and adjusting countless parameters. Now, AI tools are automating parts of this process while still allowing for human refinement.
AI Vector Generation
The journey often starts with generating the vector art itself. Adobe Illustrator now includes generative AI tools that can create professional-grade vector art from simple text descriptions. You open Illustrator, draw a simple rectangle, access the Generate Vectors tool, and type a prompt like "a modern stylized owl" or "a vintage floral crest" . The AI generates variations based on your description.
But here is the key for embroidery success. You need to guide the AI to produce digitizable artwork. Set the content type to Subject, choose Flat Design rather than 3D or photorealistic, and limit colors to 5-8 to prevent the design from becoming too complex for a standard embroidery machine . The most important tip? Avoid gradients. Gradients are difficult to translate into thread, while flat design ensures solid color blocks that map perfectly to stitch types.
Automated Stitch Conversion
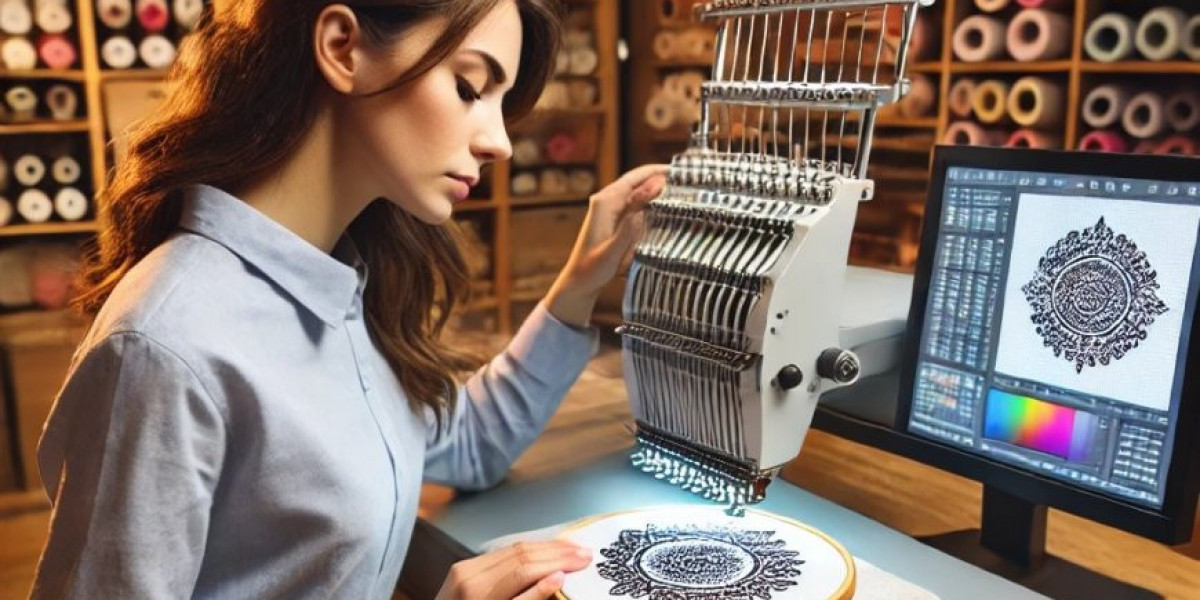
Once you have your vector art, modern embroidery software handles the heavy lifting automatically. DRAWings PRO XII is one of the few professional suites that uses a powerful vector-based engine that reads your AI-generated file and instantly converts shapes into stitches . When you import an AI or SVG file, the software instantly analyzes the paths, curves, and fills. It automatically assigns the most appropriate stitch type, such as satin for thin columns or step stitches for large filled areas, based on the shape's dimensions.
The automation goes even further by calculating necessary underlay, compensation, and exit points for a successful sew-out . Because it is a dynamic system, if you resize the vector, the software does not just stretch the stitches. It actually recalculates the entire design to maintain the correct density.
The Professional Workflow for AI Vector to Embroidery
Whether you use AI tools or traditional methods, the core workflow remains consistent. Here is how professionals convert vector art into embroidery files.
Step 1: Prepare Your Vector File
Start by cleaning up your artwork in your vector software. Remove unnecessary details, simplify shapes, and make sure everything is neat and aligned. Convert all text into outlines so that fonts do not get lost or replaced. Merge overlapping shapes using the Pathfinder tool and remove hidden layers .
If your vector was generated by AI, check for hidden overlapping layers. AI vectors can sometimes have extra layers that cause unnecessary stitching and thread breaks . Also, check that your design is not too complex. AI tends to add fine details that might be too small for a physical needle and thread. When writing prompts for AI, add keywords like bold lines or minimalist .
Step 2: Import into Embroidery Digitizing Software
Import your vector file into professional embroidery software. Options include Wilcom EmbroideryStudio, Melco DesignShop, Hatch, or free alternatives like Ink/Stitch . The import process is usually straightforward. In DRAWings PRO XII, for example, you simply navigate to File > Open or Tools > Import and select your file .
Step 3: Assign Stitches and Parameters
This is the core of the conversion process. You must define how the machine should interpret those vector paths. Assign the right stitch types, satin for outlines, fill for solid areas, and run stitches for details. Set stitch angles carefully because the direction of stitches affects how light reflects off the final embroidery. Adjust density based on fabric type and add pull compensation to prevent distortion .
For AI-generated vectors, you can also make direct edits to the artwork if needed. In DRAWings PRO XII, your AI art remains fully editable as live vector objects. You can move nodes, thicken lines, or adjust shapes, and the stitches update instantly in the background .
Step 4: Export to Your Machine Format
Once digitizing is complete, export your file in the correct format for your machine. Common options include DST for Tajima and commercial machines, PES for Brother, JEF for Janome, EXP for Melco and Bernina, and HUS for Husqvarna Viking . Always check your machine manual before exporting.
Before finalizing, preview the design in 3D mode if available and, if possible, do a test stitch-out to catch any issues before production.
Free Open-Source Options
If you are on a budget, Ink/Stitch offers a free open-source alternative. This extension for Inkscape allows you to convert vector images directly into embroidery files . The workflow involves bringing your image into Inkscape, using Trace Bitmap to convert raster images to vectors, then going to Extensions > Ink/Stitch > Params to set stitch parameters like length, density, and fill type .
The software includes a simulation tool that animates the embroidery process step by step, showing how the needle moves and the stitching develops . Once you are happy with the settings, you can export the file as a PES or other compatible format.
The catch is the learning curve. Inkscape itself requires vector graphics knowledge, and adding Ink/Stitch demands even more technical understanding . The conversion process can also take a while, up to a few minutes for large or detailed designs . But for hobbyists and small businesses, it is a solid starting point.
Common Challenges and How to Avoid Them
Converting vector art to embroidery files comes with common hurdles. Knowing them in advance saves time and frustration.
One challenge is too many small details. Vector designs often include tiny elements that look great on screen but do not translate well to thread. Simplify the design before digitizing and remove any elements smaller than 1-2mm . Thin lines and gradients are another issue. Very thin lines may not stitch cleanly, and embroidery cannot blend colors smoothly like digital graphics . Use solid blocks of color and slightly thicker lines.
Complex color blends also cause problems. Unlike printing, embroidery uses thread colors, not pixels. Limit colors and avoid complex shading . A good digitizer can sometimes simulate shading with special stitch techniques, but simple is always safer.
Finally, poor pathing leads to jump stitches where the needle jumps between areas and excessive trims. Plan stitch sequences carefully or choose a digitizer who knows how to optimize pathing .
Conclusion
AI vector to embroidery file conversion is transforming how we create stitch files. Whether you use AI to generate artwork, automated software to convert vectors, or professional digitizers to refine the process, the goal is the same. Turning your clean vector designs into production-ready embroidery files that stitch flawlessly.
Start with clean, simplified vector art. Use AI tools to generate concepts, but guide them toward flat, minimalist designs that work well with thread. Choose software that matches your skill level and budget, whether that is professional tools like Wilcom or free options like Ink/Stitch. And never skip the test stitch. No software simulation can perfectly predict how a design will behave on actual fabric.
With the right tools and workflow, you can transform any vector artwork into a beautiful, reliable embroidery design.